The idea with this build was to make a very light weight very low profile wireless keyboard for travel purposes. Perhaps even for Long Term Travel purposes. It has evolved a fair amount over time, but I think it’s mostly in its final form. I do get a lot of questions about various aspects of the build, so I thought I’d finally do a writeup of what all I have.
From a very high level, this is a:
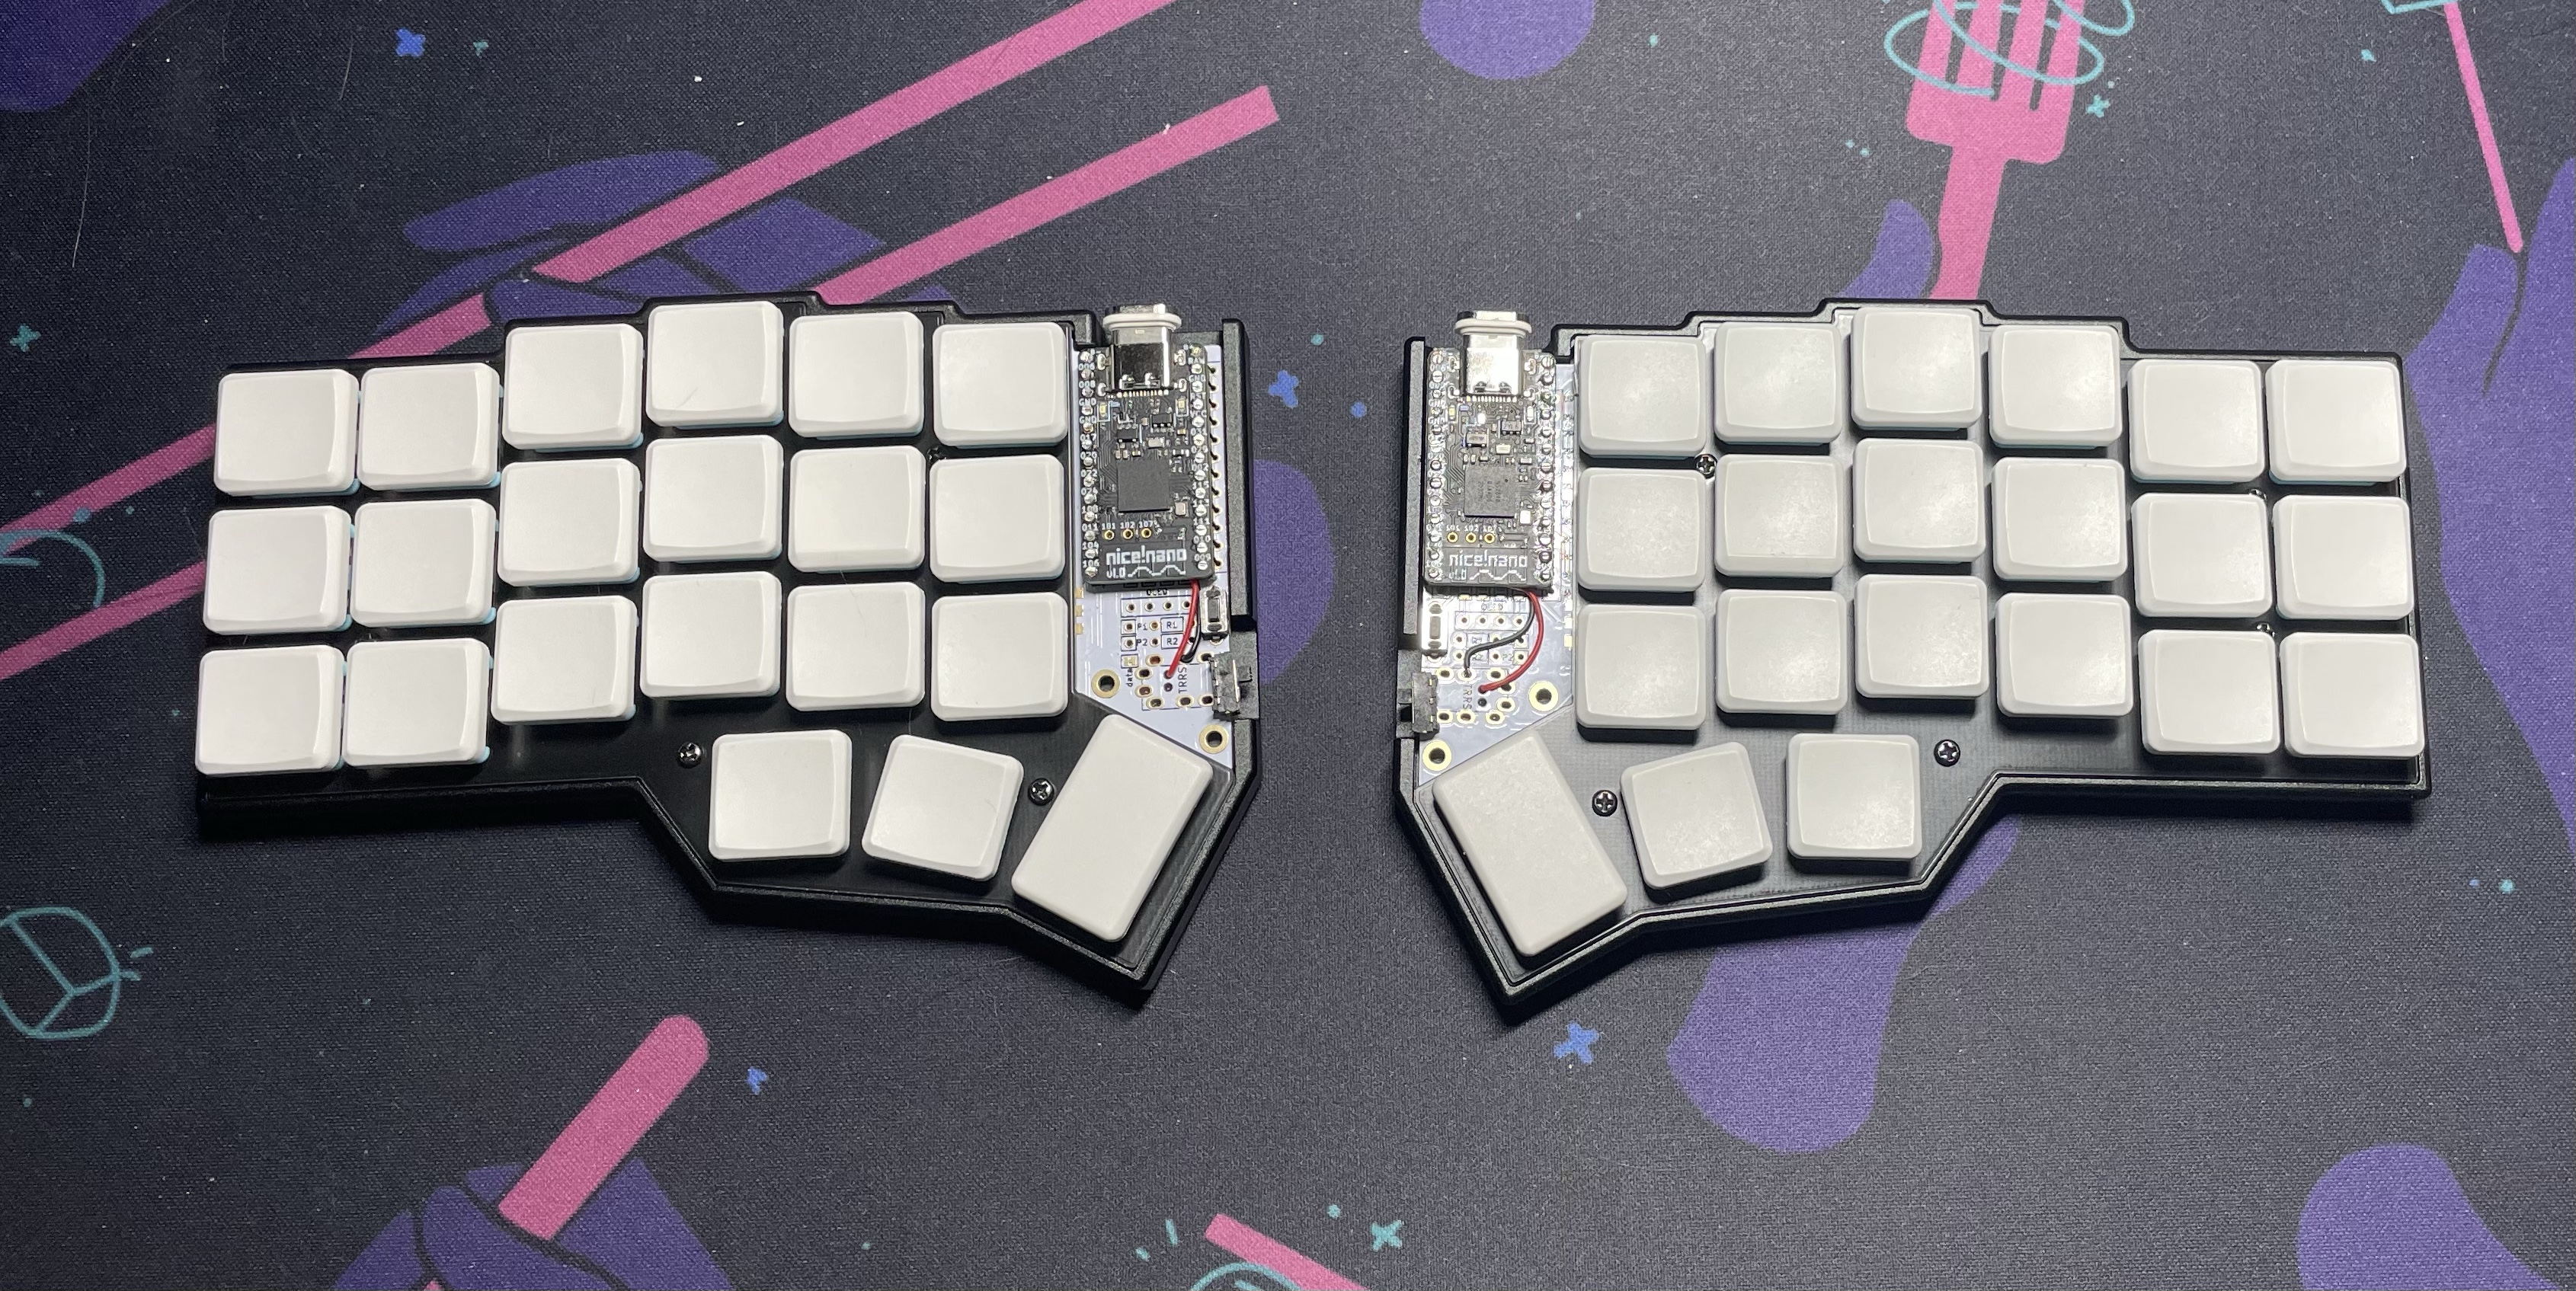
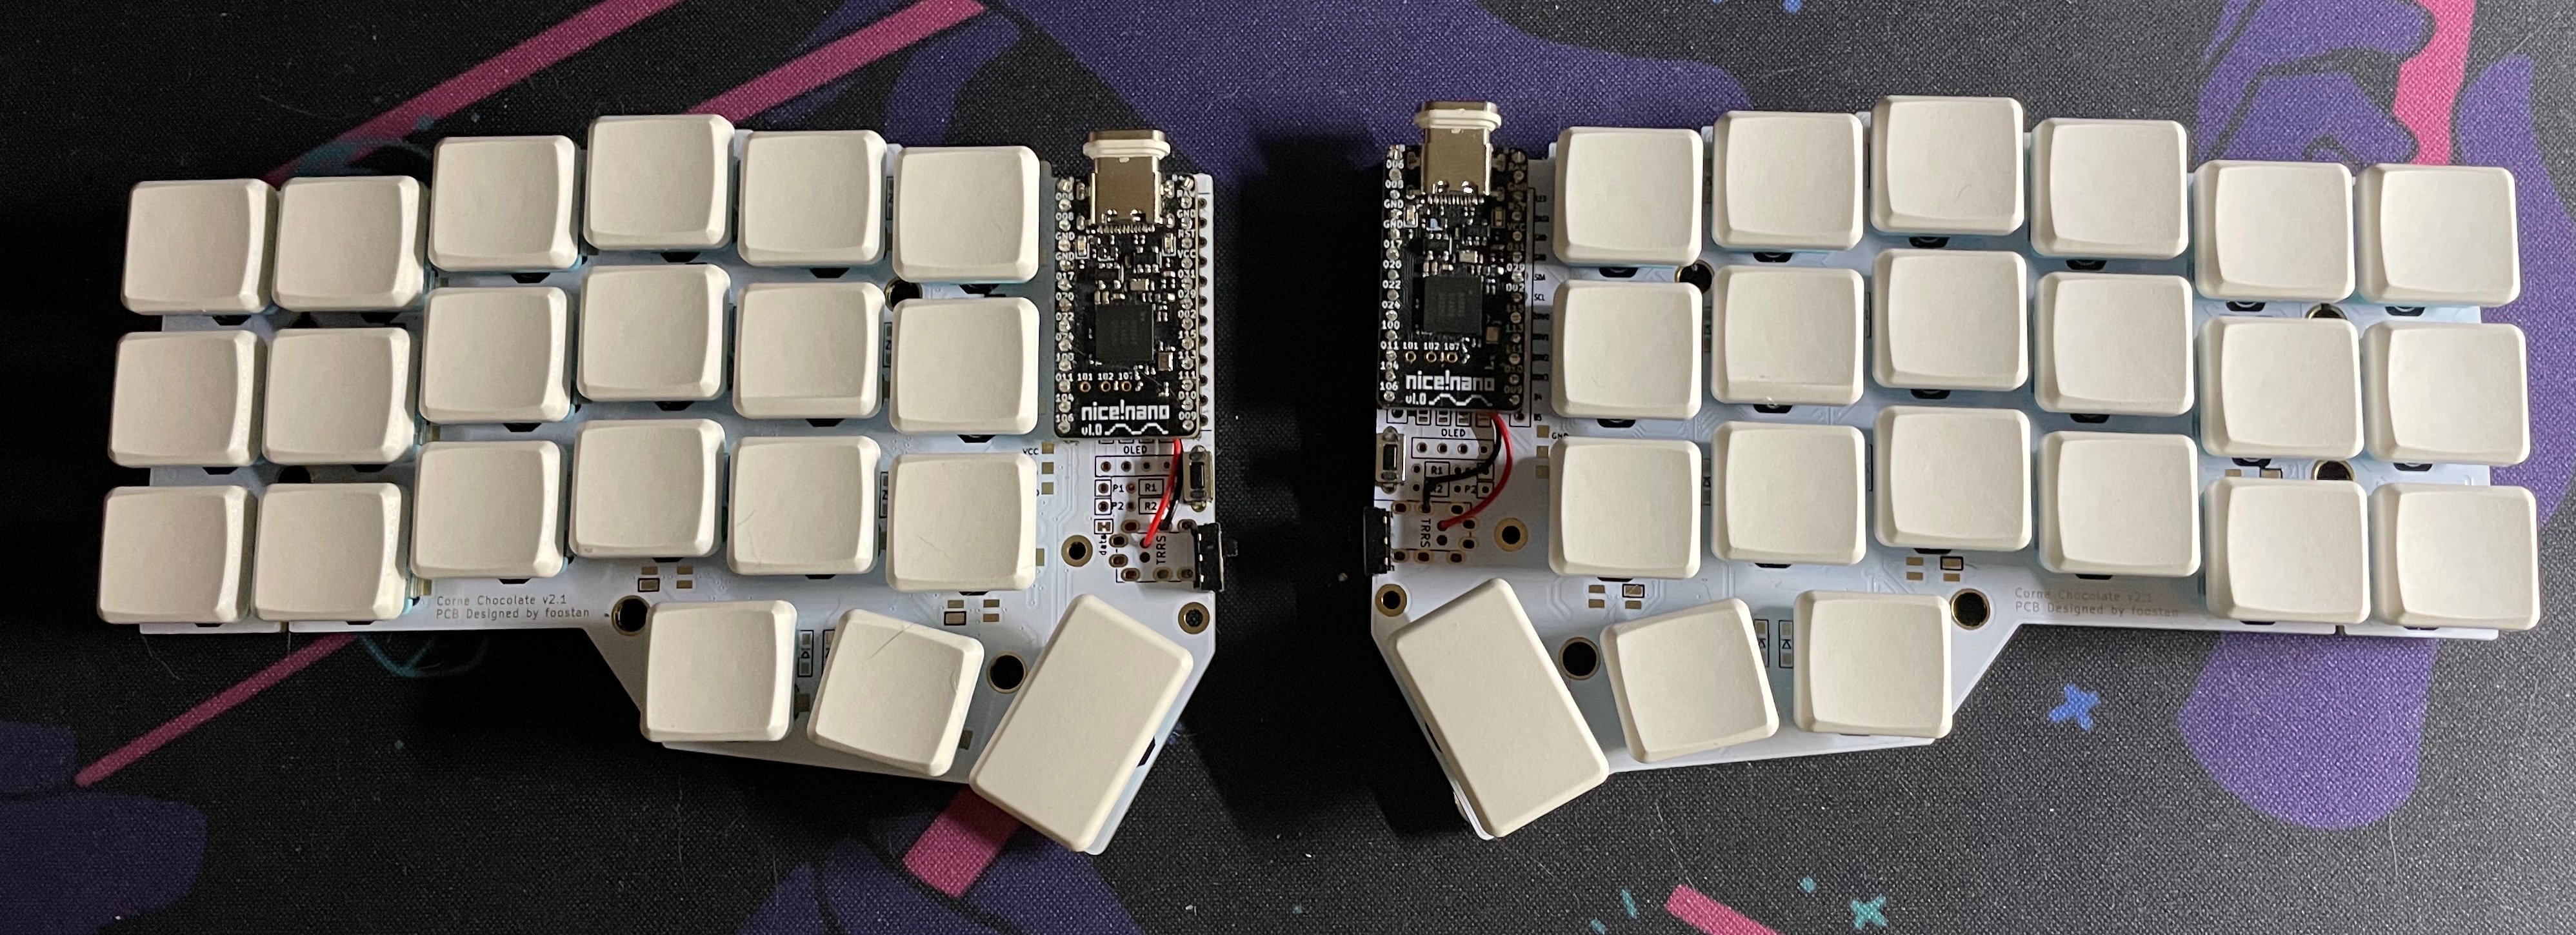
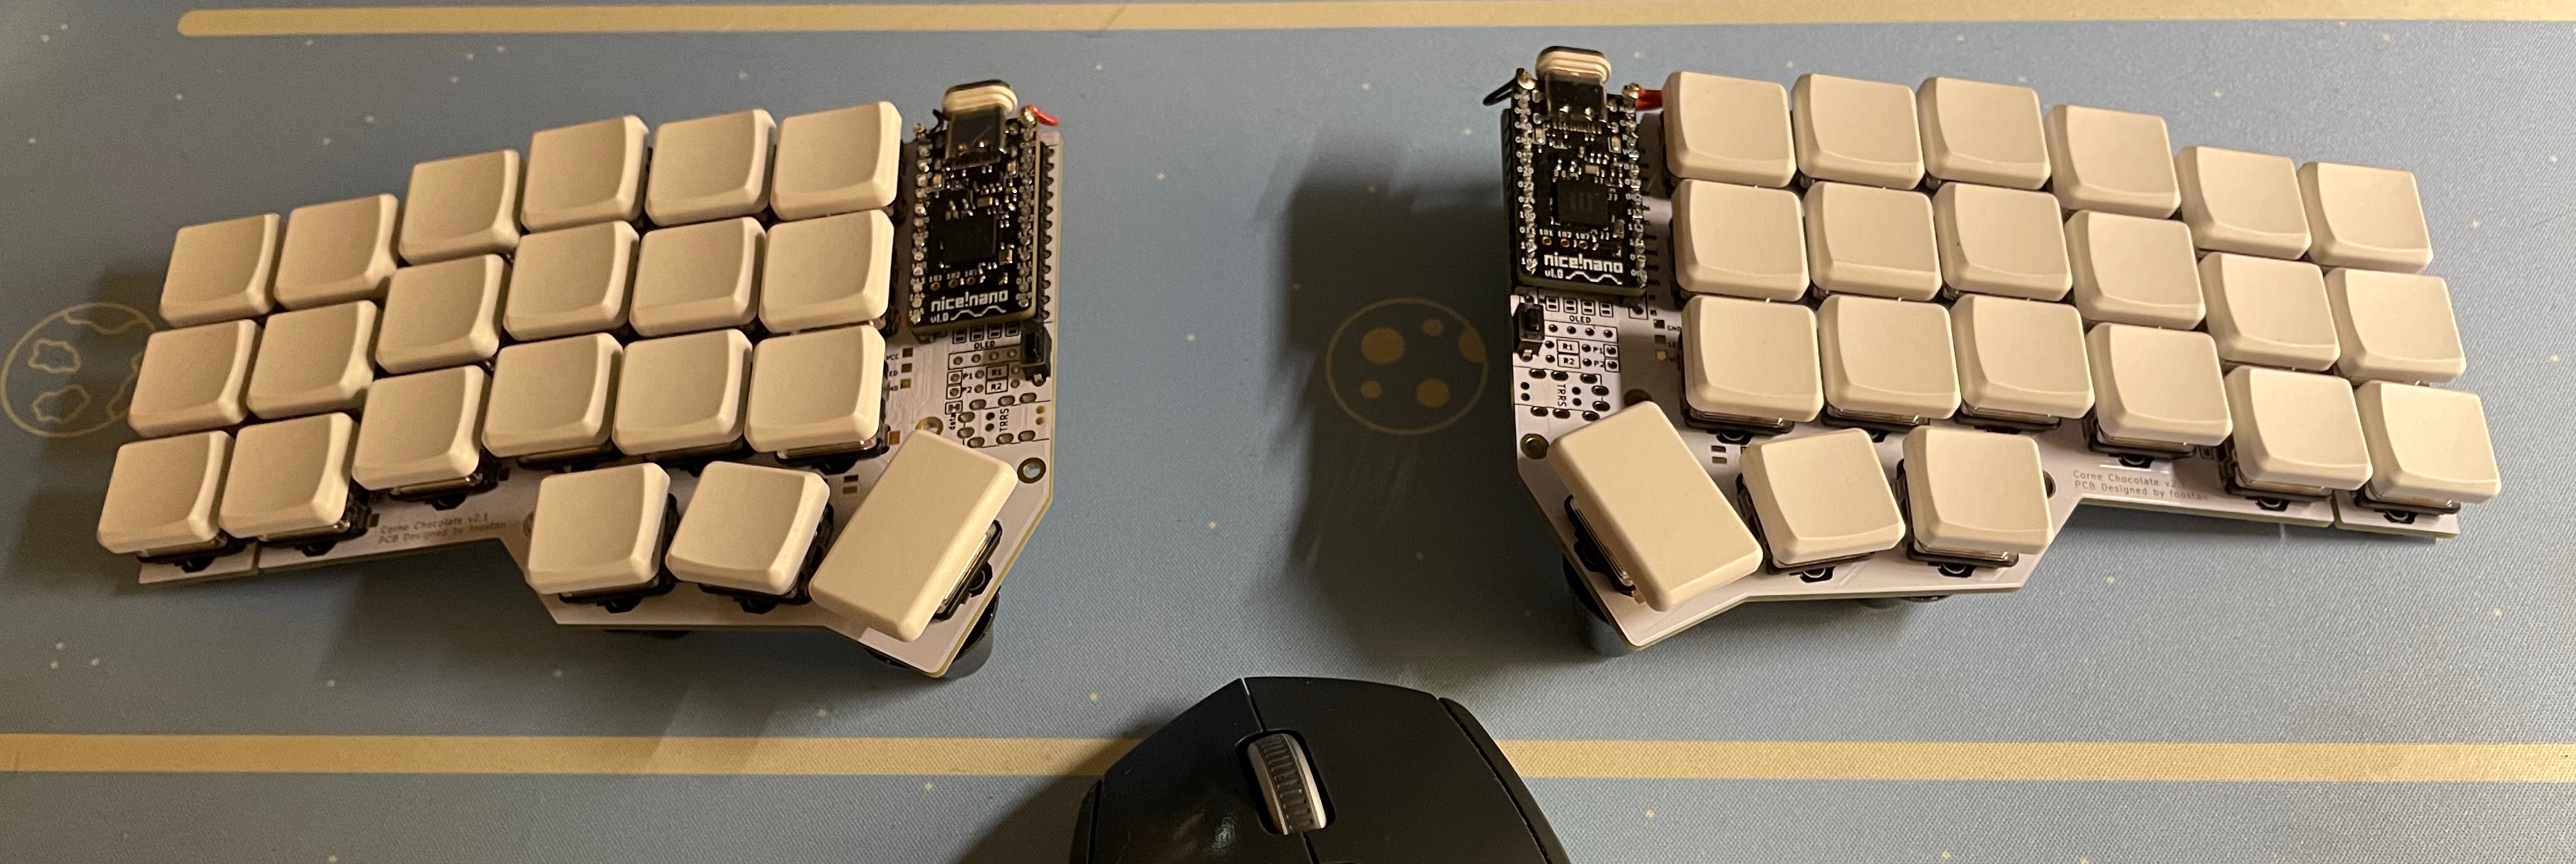
- Corne Chocolate v2.1 PCB kit
- nice!nano controllers
- choc robin switches
- mbk blank white keycaps
- Corne LP case
There are no OLEDs, nor are there any RGB LEDs.
The build itself is a pretty standard choc corne build: SMD diodes, kailh hotswap sockets, and reset button. I could have done without the reset buttons, but I was resetting the board so much while trying to get everything figured out and connected to bluetooth and such I ended up soldering them on for easier resetting.
The nice!nano controllers are mounted face up, using the controller holes for the other side of the board. I did this because I wanted the flat side down on the nanos, to make them sit much lower on top of the 301230 batteries that are stuffed underneath them.
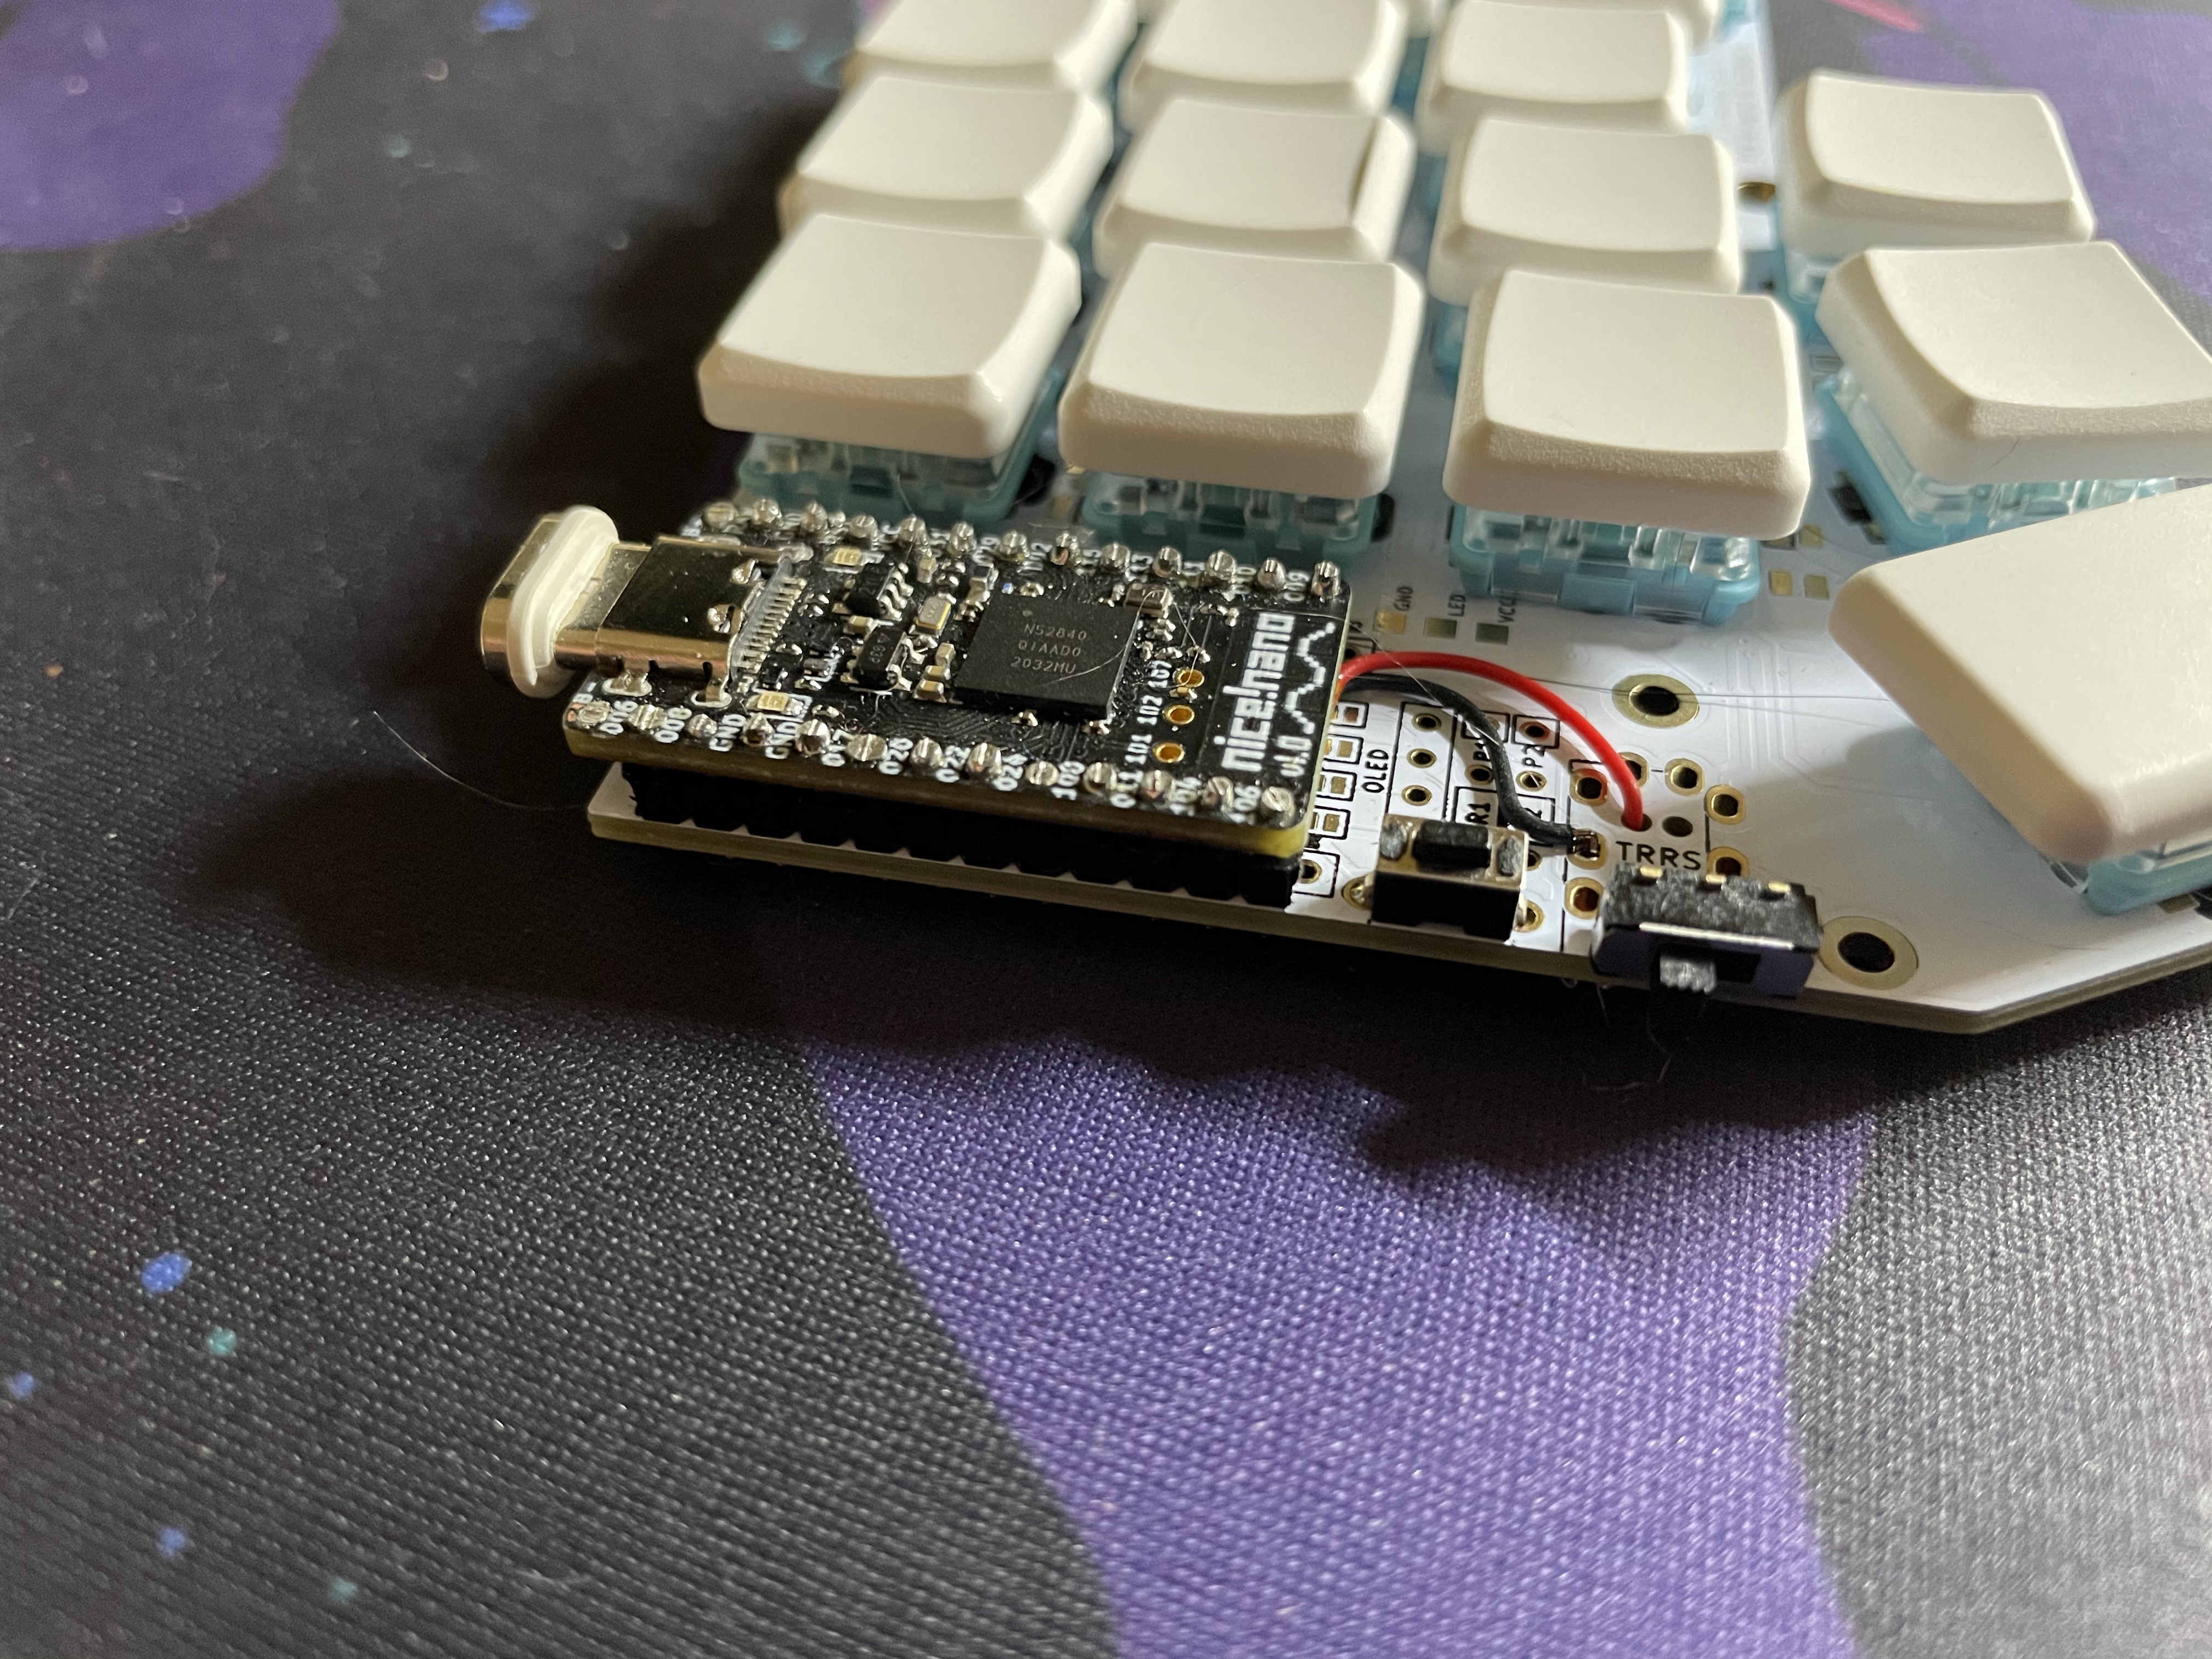
I installed the batteries so the wires were coming out of the bottom of the controller area and routed them through holes in the TRRS footprint to the underside of the board. One of the TRRS pads is actually for ground, so I routed the black/negative wire through there and soldered it on the underside. The red/positive wire goes through one of 4 holes in the footprint that doesn’t have any pads on it.
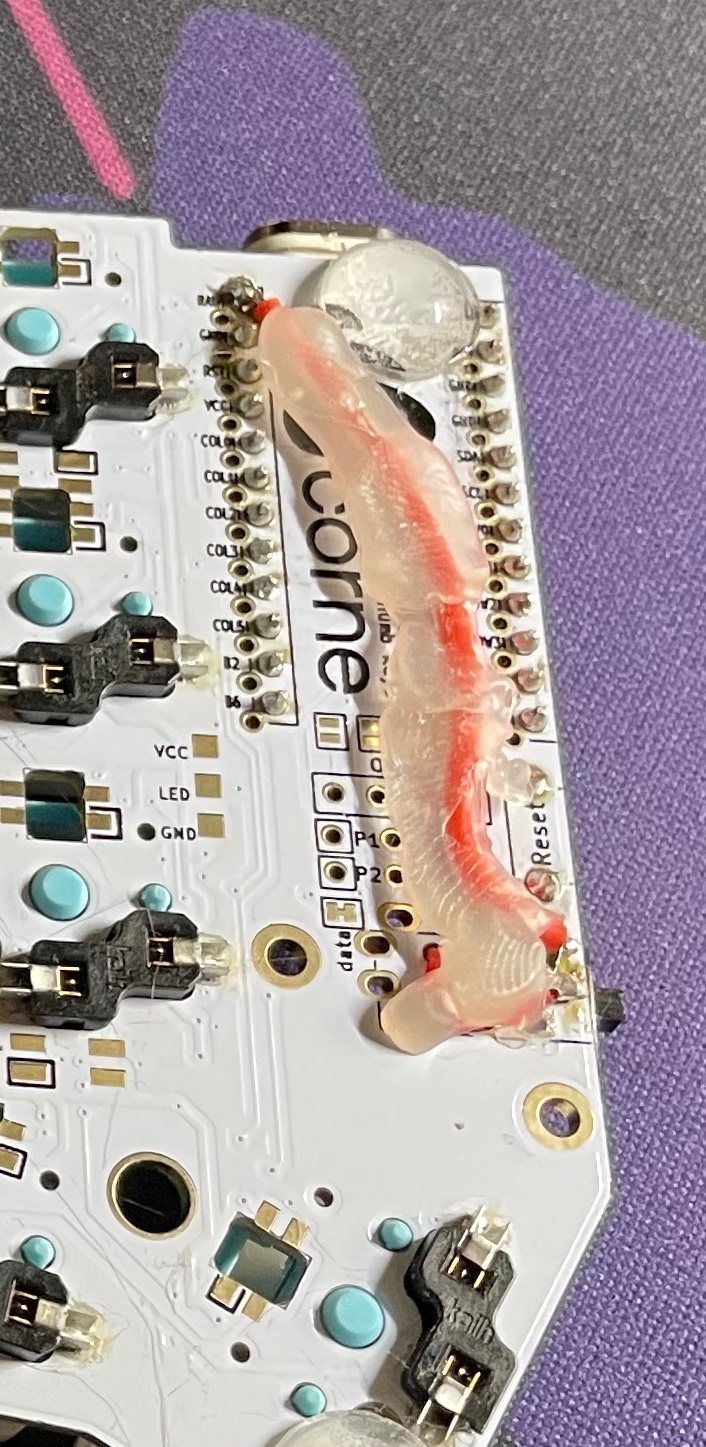
The switch is a SPDT slide switch I got from digikey. I use it to be able to switch the power off entirely to the keyboard so when I put the board into my backpack it’s not powered up. The switch has 3 legs, one in the center (the Pole) and one on either side of that (the Throws). I clipped one of them off and pushed the other 2 through no-pad holes in the TRRS footprint. On the bottom side of the board I soldered the battery lead to one of the legs, and a little bodge wire from the other leg to the RAW pin on the controller.
I then squeezed some hot glue on to secure the wire in place so it would hopefully not get snagged on things, as originally this board was meant to be used without a case, and was used that way for several weeks.
Soldered nice!nanos?!
Yes, I soldered my nice!nanos on. I haven’t been an especially big fan of the mill max sockets + diode legs thing, I feel like the diode legs are too thin and bend too easily, making pulling the controller and reinstalling it a pain. And honestly, that’s about the only reason why. I may try all day to justify it for any other reason, but in the end, it’s just that I don’t like the traditional solution. I am on the lookout for better mechanisms for swappability of controllers, though, so perhaps a future build will feature one of those.
Corne LP case
Eventually I decided to buy a Corne LP case for it. I’d seen lots of pictures of folks with theirs and thought it looked really nice, so went for it. I’m glad I did. I do still very much like the naked PCB vibe, and especially for Long Term Travel the case is too heavy, but I also like the aesthetic of the Corne LP case. I can always build another naked PCB corne!
Lifted switch pads!
One thing that happened with this build is after much swapping of switches and whatnot, I *finally* pulled my first pad from inserting switches into kailh sockets. When I was installing the switches into the plate, one of the pins must have been misaligned, and given that the plate requires a bit of force to seat the switch, I didn’t think anything of applying a bit more force when pushing the switch in. Next thing you know, I have a socket popped off the back of the board. Fortunately it was an easy fix, most of the socket and its pads were still electrically intact, so I just needed to run a little bodge wire from one of the switches to the next in the column and route around the mounting holes and all was well.
Tenting
I’d just finished adding some conical rubber feet to my MX Corne right before I built this board and wanted to figure out some sort of tenting solution for this as well. It may seem odd to want to tent a low profile keyboard, but for me the low profile and naked PCB aspect and such is much more about portability than about ergonomics.
I will say that I made several attempts at securing the same conical bumpers to this board, and while it worked for a time, the hot glue just didn’t want to stay stuck to the PCB, and there’s not enough flat surface on the bottom anywhere to secure the feet directly. I eventually gave up and haven’t used the board tented since. Hell, for a while I didn’t even use any bumpons at all on the board, but I recorded a video of typing on it and someone commented that it was moving all over the place, something I’d noticed but it hadn’t bothered me, and suddenly it bothered me a lot, so I threw some bumpons on.

Now that I have it in the Corne LP case, it’s possible I may try tenting it again, but I’ve also discovered that if I spread the halves apart more, I can get a lot of the additional comfort I get from tenting just my having my arms a bit straighter and therefore not have to rotate my wrists so much. So we’ll see.
ZMK
As this board is using nice!nano controllers, I am running the amazing ZMK firmware on it. It’s the first board I’ve fully set up ZMK on and used and I ported my keymap over from QMK. So far ZMK has support for all of the functionality I want, and the fact that the board is fully wireless is pretty awesome.
I will say that I’ve had some trouble keeping the thing paired to my macs. I have a macbook pro from work, a personal macbook air, and a personal m1 mac mini, and all of them seem to have trouble keeping paired for some reason or another. However, my primary target for this board is my iPad, and it works perfectly with that. For the other computers in my life, I just hook up the central (left hand) side via usb, something I already have set up anyways for wired boards, and that works perfectly fine. At some point I may try to dig more into the bluetooth macos issues, but for now I am not super concerned about it.
Finally
All in all I love this board. I’ve been using it as my daily driver for well over a month now. I’ve gone through a bunch of different switches: tape/lubed reds, robins, gchocs, robins, dark yellows, robins, and now I’m back to robins and probably going to stay that way. I *might* try whites, but I feel like I’ll be starting to play with fire regarding my sockets if I don’t stop swapping out switches all the time. I am almost certainly going to play around with different cap colors, and I even have some surprise caps coming in that I’ll try out!
did you have to change anything to run just the naked pcb? how was it? any problems etc, been thinking about going that route with my corne
Nope! Works just fine for me!
Hi, kitchen. How are you? I hope you are doing well. So I saw your videos on Youtube, and then I want to turn my Corne Choc into wireless split as well(by replacing my Promicro with nice!nano). I can just take my Promicros off without any issue since I am using conthrough on both of them. Just wondering if I don’t take off the TRRS jack, and just solder my battery straight on my nice!nano, will it sill work?
It should work just fine, yep! But you don’t want to wire the nanos to each other using the trrs, so you might want to take them off or fill them with glue or something.
hi, maybe nfrmicro will work better with mac?
Nah it is almost certainly a firmware thing. Since I published this post, zmk has done a bunch of stuff with Bluetooth pairing and the mac and it’s been much better now, at least with my other boards. I haven’t used this one in some time 🙂
Can’t really understand how you wired the thing, there’s so much glue. Does the red from the battery go to the center or the sides? Does it matter which side of the switch you use? Or are they just throws and you just pick one
Battery goes on middle, board goes on a side. Or the other way around. Which side doesn’t matter.