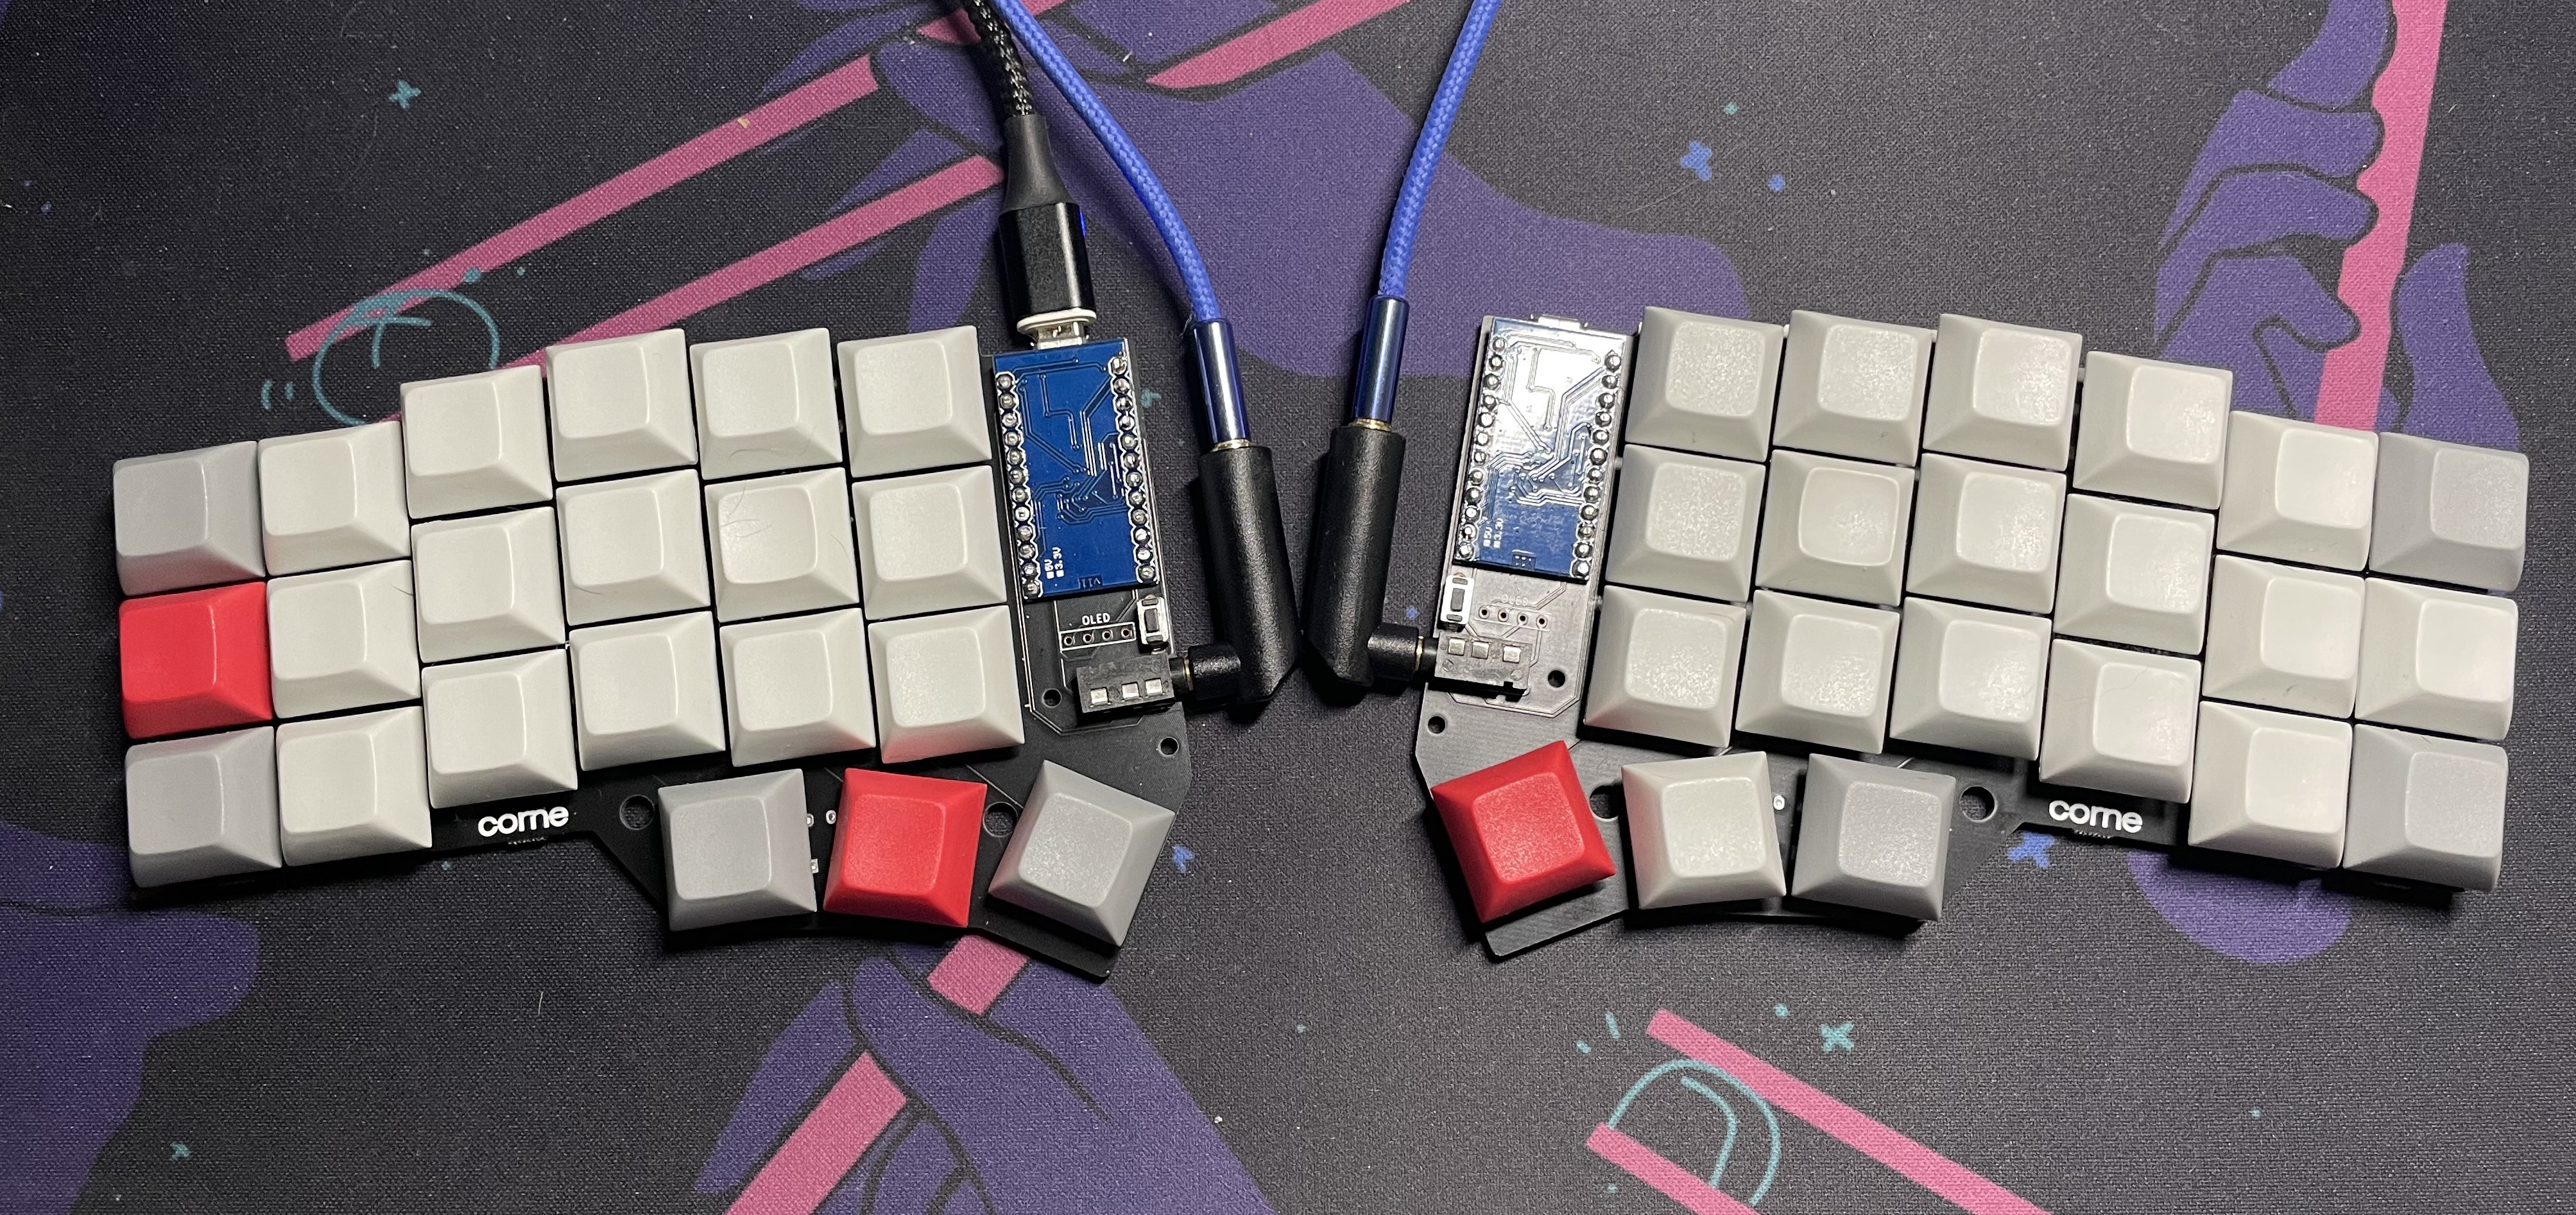
A pair of Corne Light v2 PCBs recently came into my possession from Tom. He’d built it up with Kailh Choc v2 brown switches and said he actually liked them a fair amount, so I thought I’d do one up myself and see if I liked them.
TL;DR: yes, I like them, and this is my current daily driver. But let’s get into the details, shall we?
bill of materials
- Corne Light v2 PCBs
- Kailh Choc v2 Browns
- Rando DSA blanks from Amazon
- SMT diodes
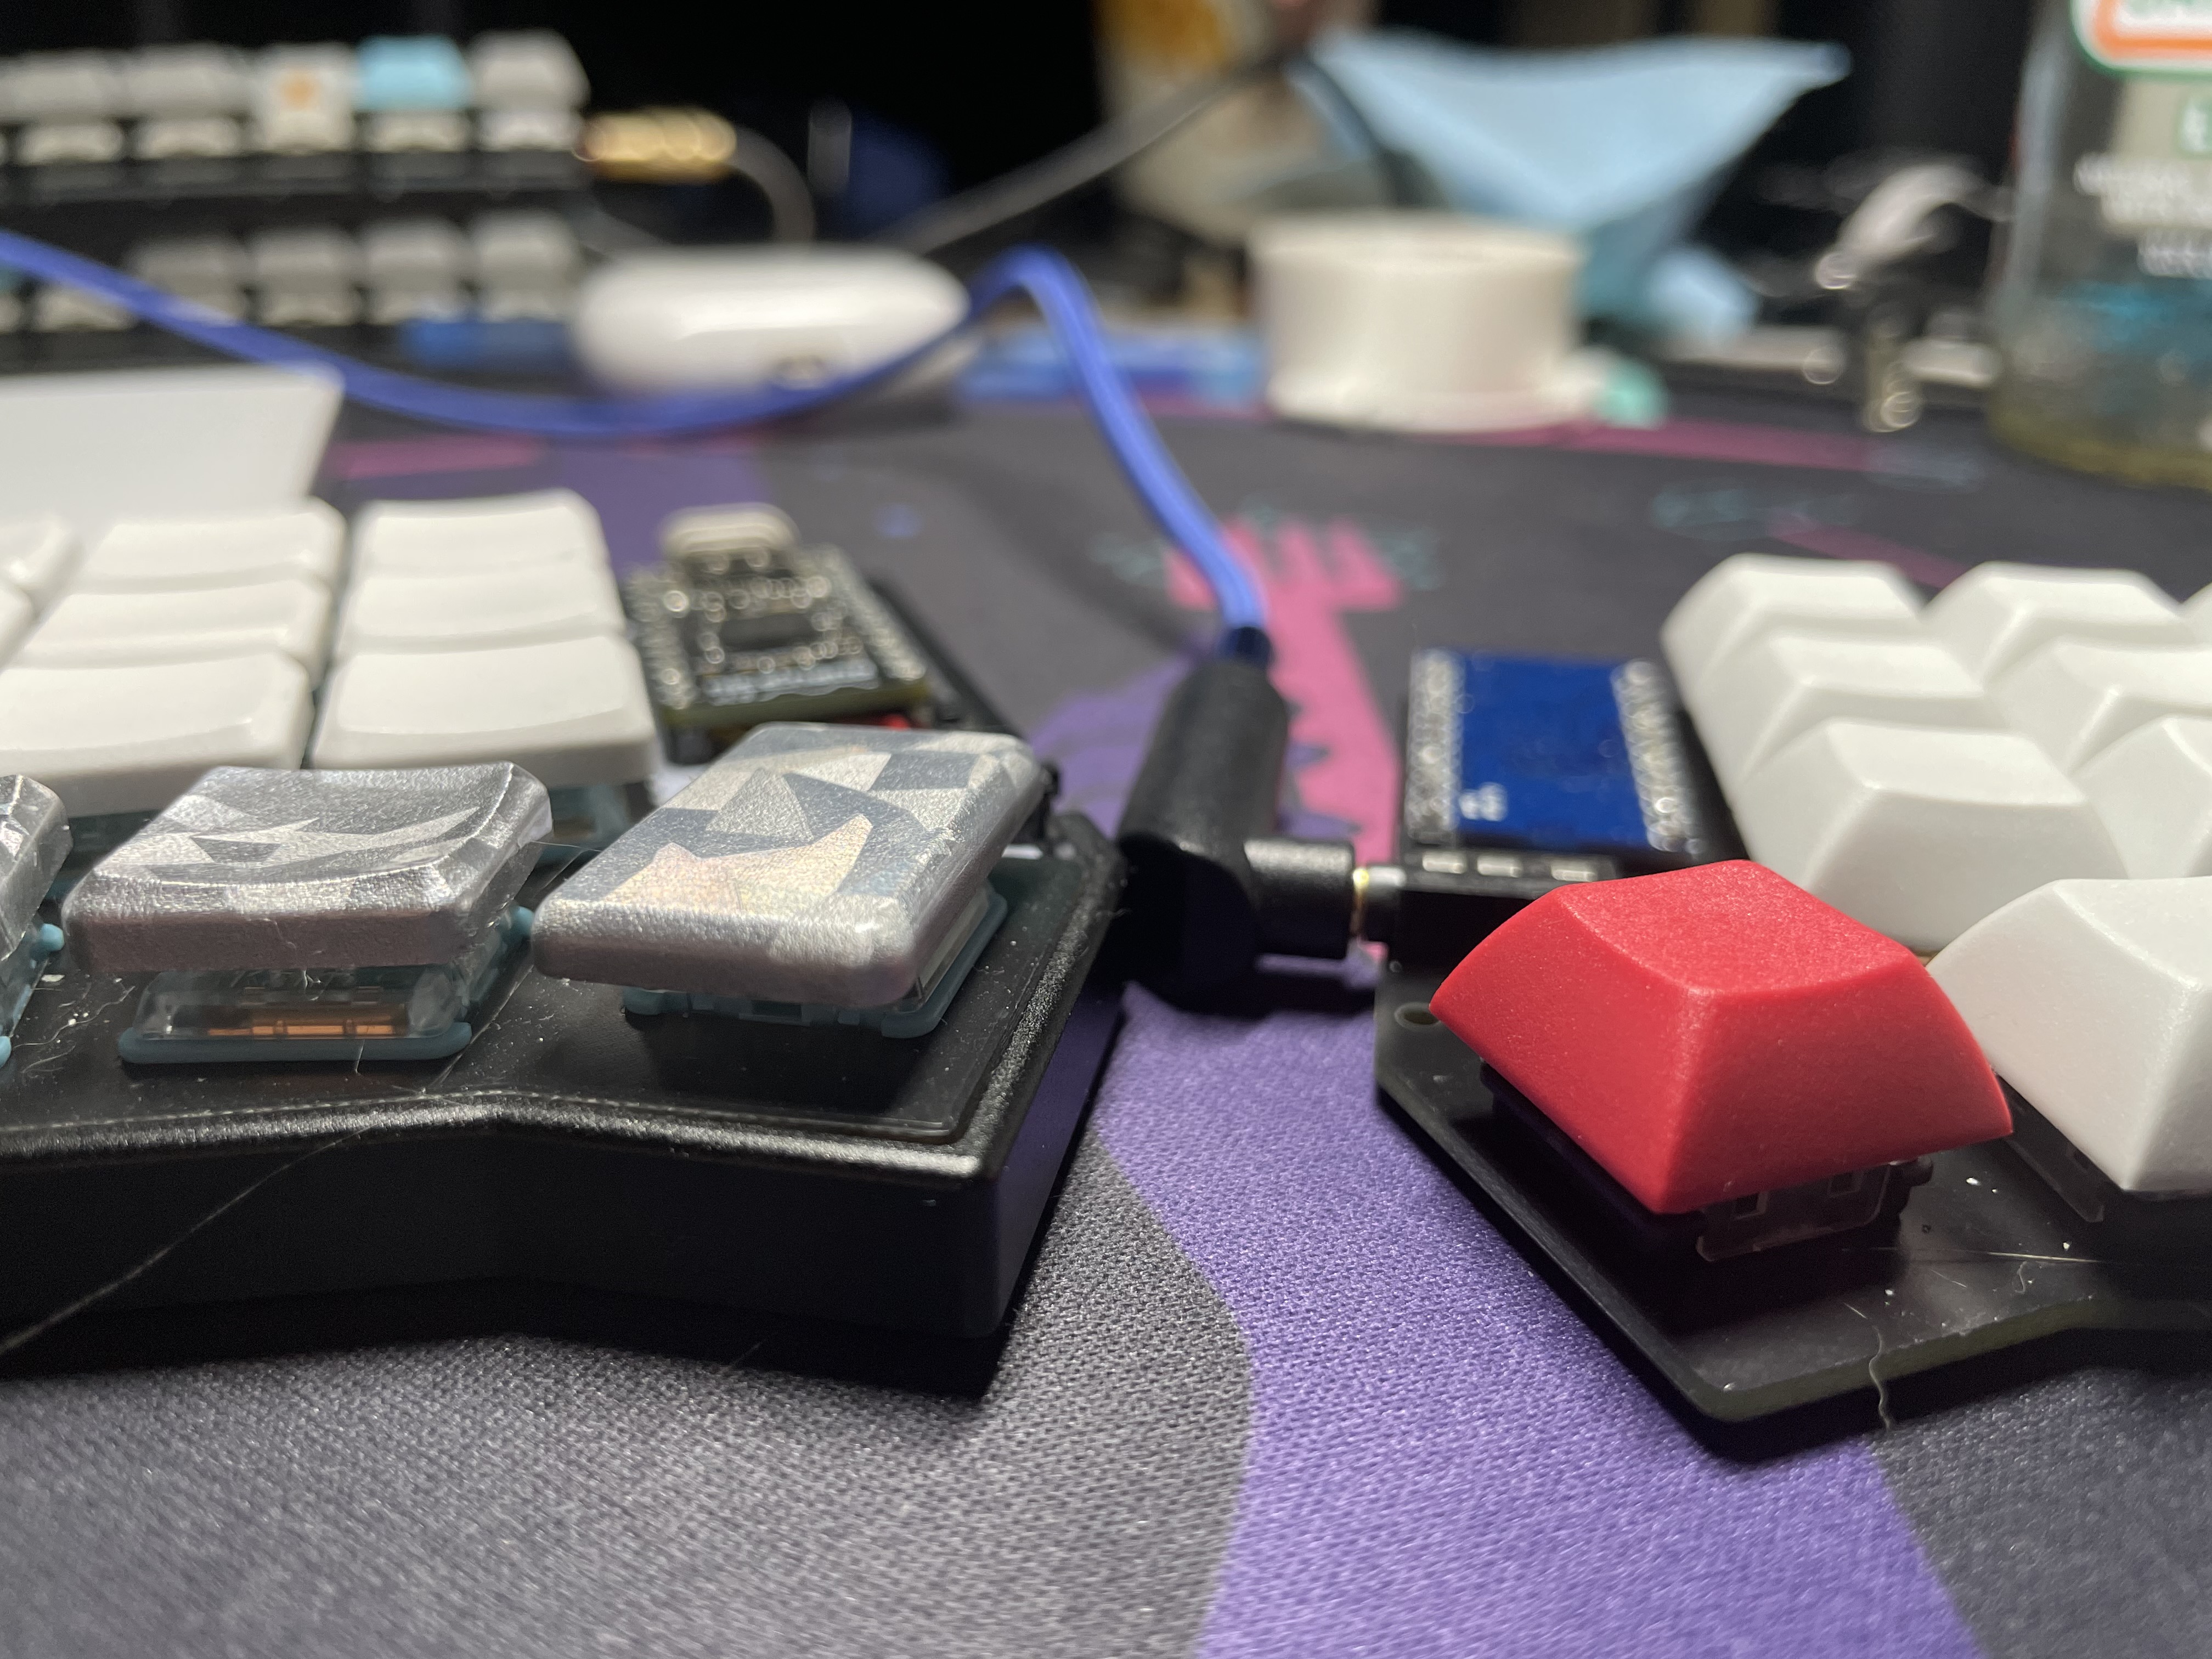
- Pair of Pro Micro controllers
- TRRS connectors and reset switches
This is a pretty simple build. I’m not adding OLEDs, the Light doesn’t have LEDs, it’s a wired build so not doing batteries or anything. Very basic and straightforward.
Diodes
I chose to use SMT diodes for this in large part because I wanted to try out the foostan technique for soldering SK6812min RGB LEDs where he brushes some flux onto the pads, the LED, and then loads up a ball of solder on his iron and sets it on the component and it immediately flows and sets up and all is well. I didn’t have as much success with it on the RGBs as I was hoping, but I’ll be trying that again in the future. Meanwhile, I wanted to see if I could use the same technique for the diodes and make it all go much faster.
In the past I’ve used through hole diodes, but that involves bending the legs, inserting them into the board, taping them in place (because I like them to be neat and tidy) and clipping off their legs. I’ve also done SMT diodes with solder paste, but that involves prepping all of the pads with paste, and then needing to clean up the board afterward because the solder paste leaves a sticky mess all over the board afterward.
With this approach I was hoping it would be both easier *and* faster than the previous approaches I’d been using, and it absolutely was. I blasted through these diodes, and this is going to be my preferred method for soldering diodes in the future.
switches
The whole point of this build, after all!
I got some Kailh Choc v2 browns and installed them. Since this is a Corne Light it doesn’t have sockets, so they’re soldered in, but that’s fine. I am not that interested in linear or clicky choc v2. If I want those, I already have my preferred switches in the Choc v1 form factor.
I will say, I like them a fair amount. They’re more tactile than, say, the Choc v1 reds I was using, and quieter than the Choc robins. I haven’t actually used Choc v1 browns so not certain how they compare, but they’re pretty comfortable to type on. Not nearly as tactile as something like a Zilent or a Holy Panda, but good enough for my fingers to enjoy.
There is a weird quirk with at least one of them, though. For some reason, it’s … clicky.
It eventually stopped being clicky, and taking it apart it’s clear that the clickiness is coming from the actual switch contact mechanism making contact, but aside from slapping some lube on it and hoping for the best, I’m not really sure what to do about it.
keycaps
I am just using some cheapy DSA blanks from Amazon, but I have several kits of XDA, NP, MT3, KAT and other profiles either currently on their way or on group buy. I don’t hate these caps, though, they have a nice texture to them and the deeper dishing on the homing keys is easy to detect.
case and plate
I’m not using one. The switches are soldered, so a plate is less important, and I like my low profile builds to be *low*, so no case, either.
The finished product
all in all
I really dig this board. It’s definitely a strong candidate for taking with me on the trail. I would want to make a modified version of the PCB with first class support for nice!nano and battery powered operation though: flipped controller, battery pads, power switch option. But the switches are pretty great, and hell even these cheap caps are not bad!